Quick Start
Quick Start
 MISP (the MISP Intelligence Sharing Platform) software facilitates the exchange and sharing of threat intelligence, Indicators of Compromise (IoCs) about targeted malware and attacks, financial fraud or any intelligence within your community of trusted members. MISP sharing is a distributed model containing technical and non-technical information which can be shared within closed, semi-private or open communities. Exchanging such information should result in faster detection of targeted attacks and improve the detection ratio, whilst also reducing the number of false positives.
With the focus on automation and standards, MISP provides you with a powerful ReST API, extensibility (via misp-modules) or additional libraries such as PyMISP, jump ahead to these chapters to get started.
Login into MISP
MISP default credentials:| Username: | admin@admin.test |
| Password: | admin |
I forgot my admin password :(
You can quickly reset it via the command line. You need to know the Admins E-Mail address. Replace www-data with whoever runs the webserver.
sudo -u www-data /var/www/MISP/app/Console/cake Password admin@admin.test Password1234Tasks to do after first Start
- Change site admin password
- Activate Feeds
- Setup your User 3.1 Designate a Site Admin and an Org Admin 3.2 Add some contributing users and assign the corresponding Roles
- MISP Administration 4.1 Edit your first organisations’ name
Password Policy
[12]: Ensure that the password is at least 12 characters long[A-Z]: contains at least one upper-case[0-9| ]: includes a digit or a special character[a-z]: at least one lower-case character.
If you need a password generator use: - Ubuntu / Debian: pwgen - Built-in generator in KeePass and other password managers - Built-in generator in various web browsers
All Generator tools are only possibilities without any guarantee!
tl;dr
Create an Event
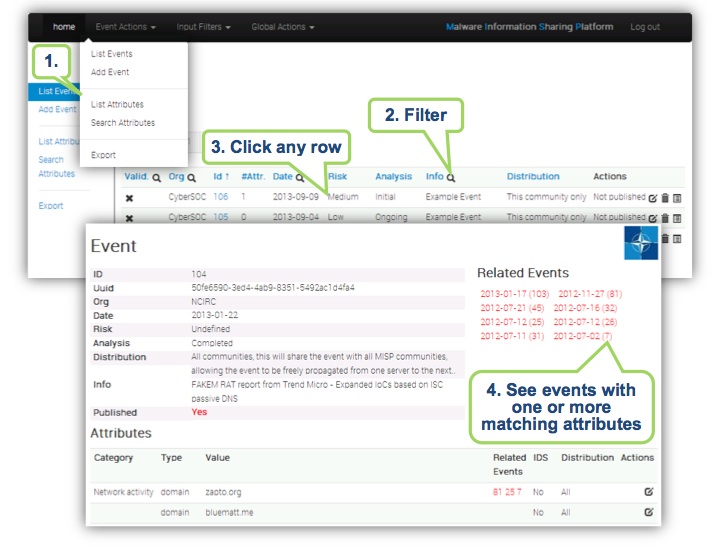
Browse Past Events
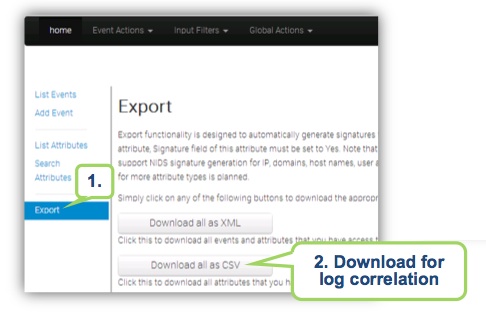
Export Events for logsearches
Create an Event
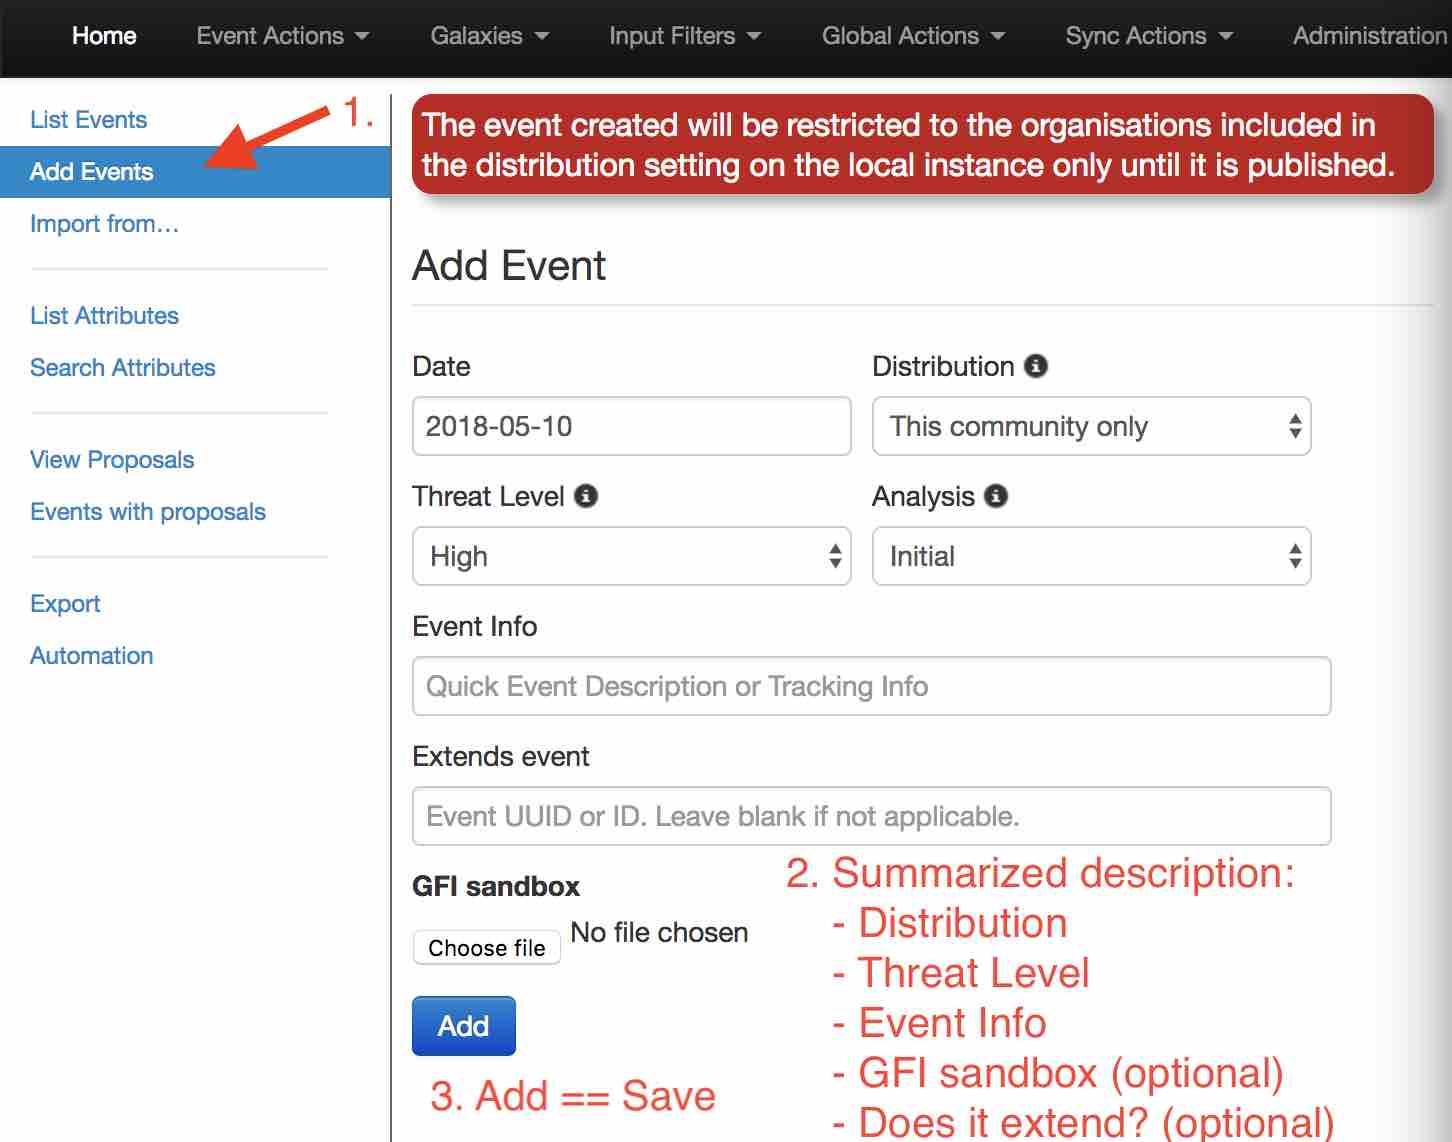
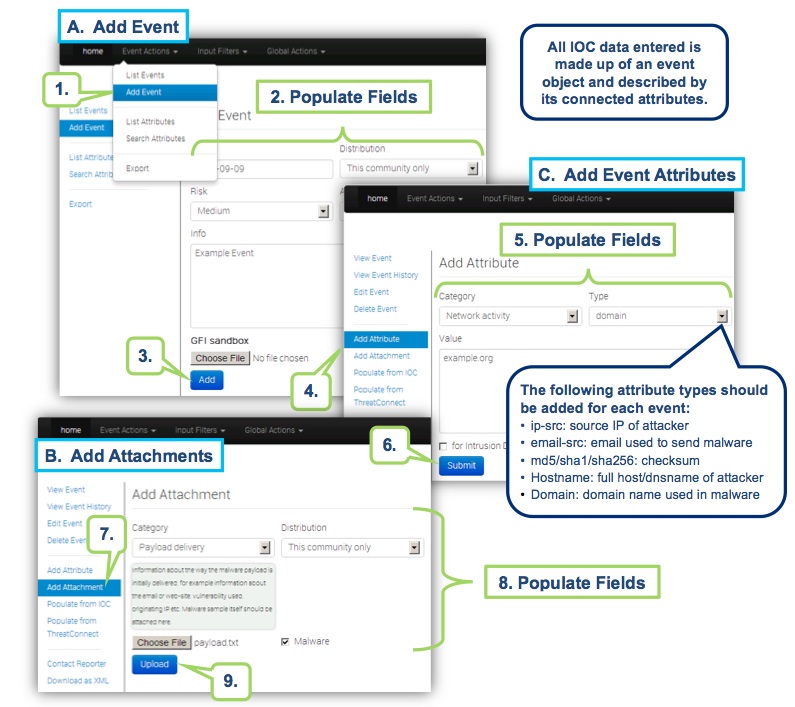
You only have to add a few pieces of information to register your Event. Further details will be specified after the Event has been added.
Describe Event
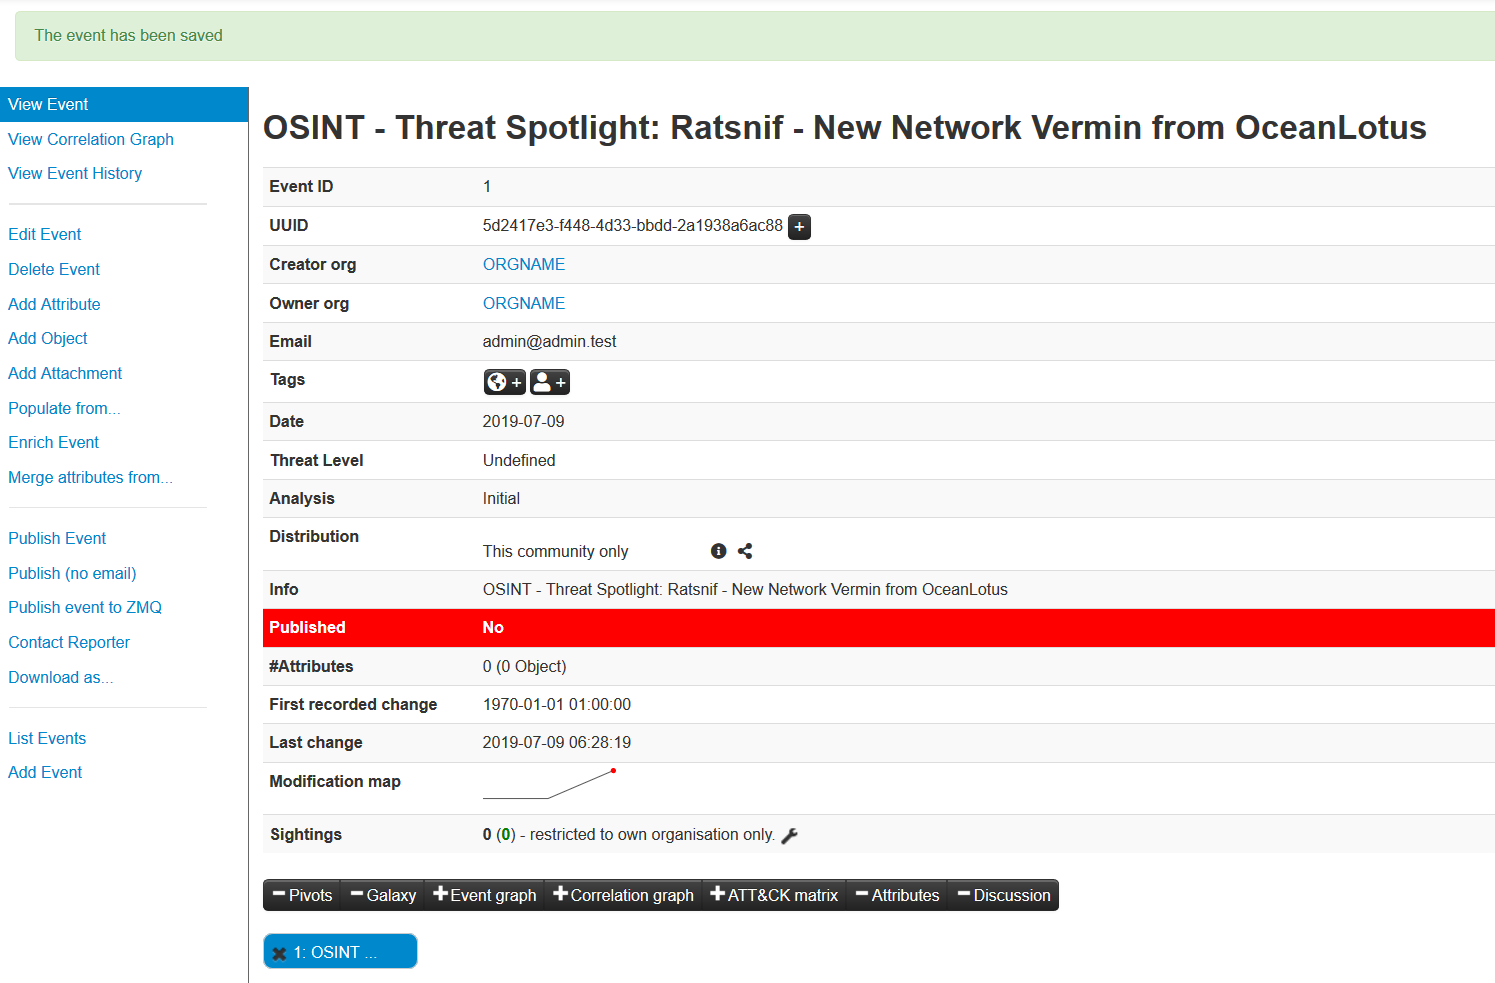
Now you can specify the information for your Event (you will need to scroll the window).
Free-Text Import Tool
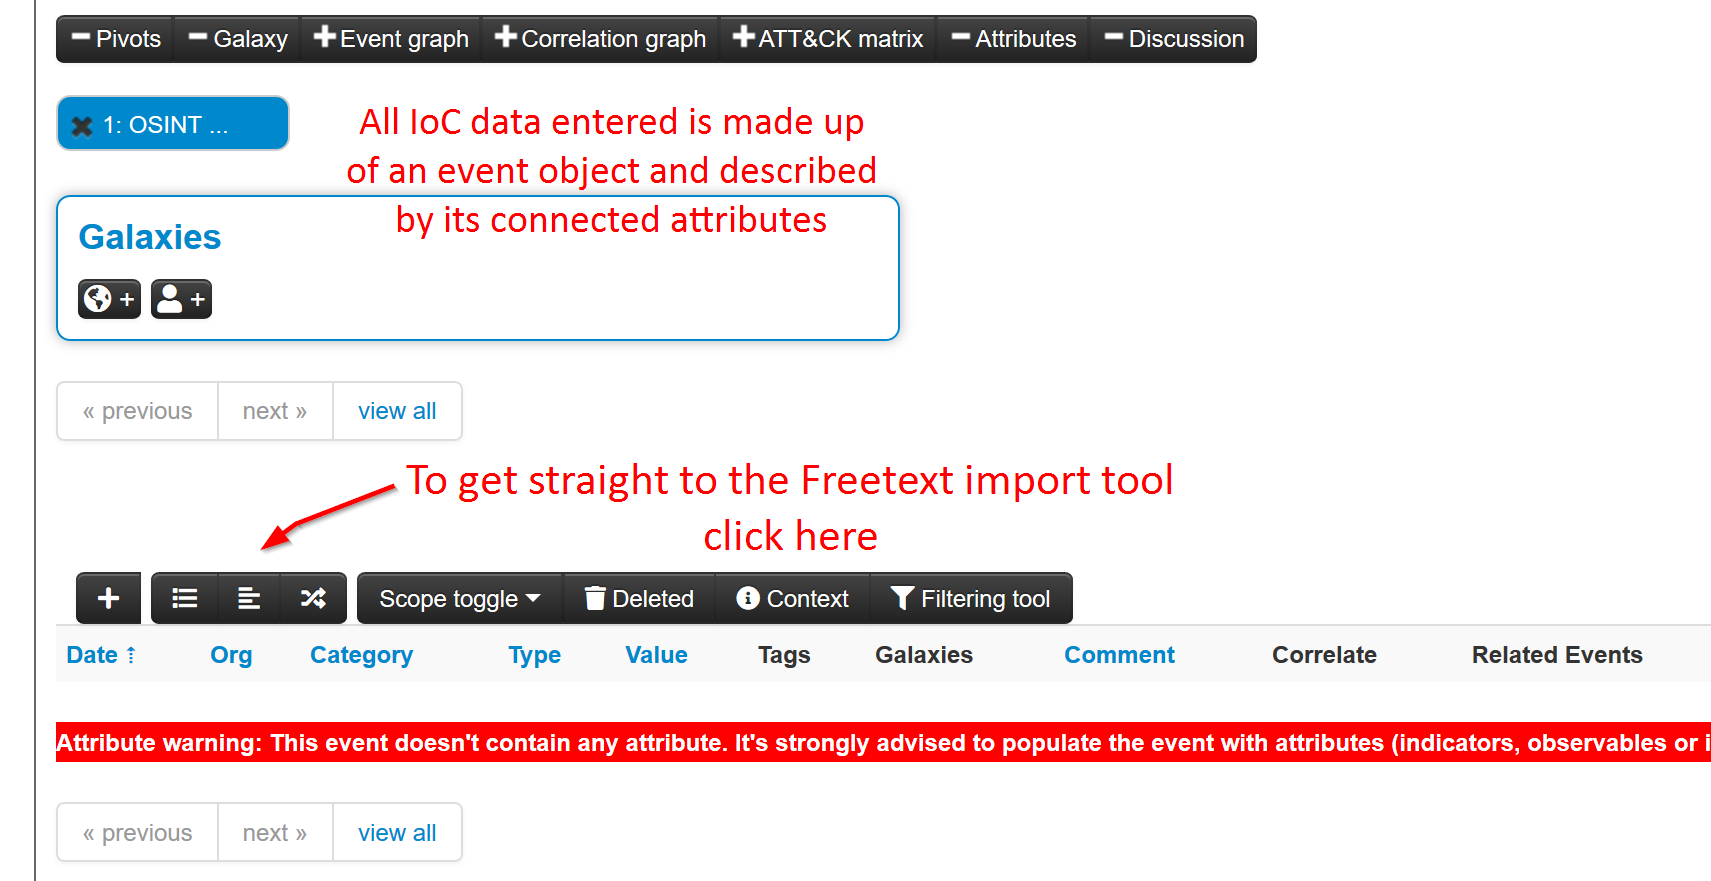
The following will pop-up.
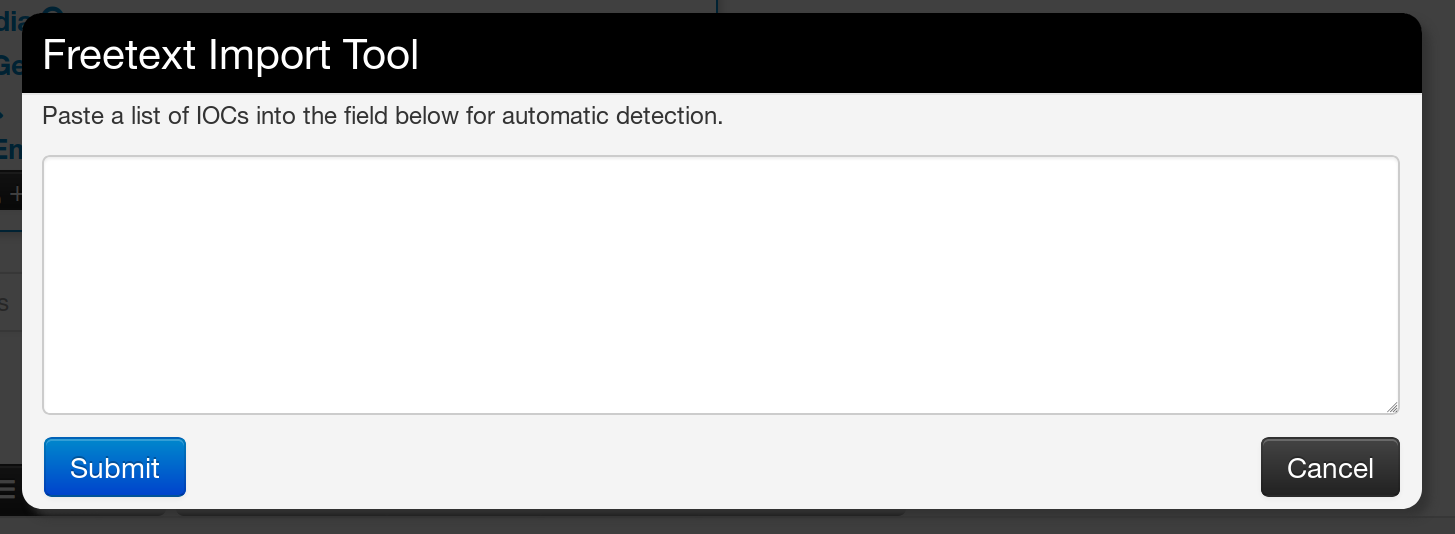
If you have a list of indicators from which you would like to quickly generate attributes then the Free-text import tool is just what you need. Simply paste your list of indicators (separated by line-breaks) into this tool.
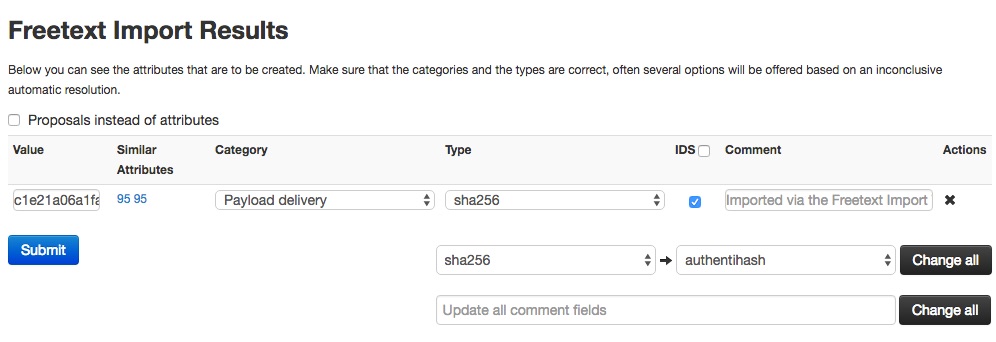
The tool will help you to find similarities between your import and other issues already registered in MISP.
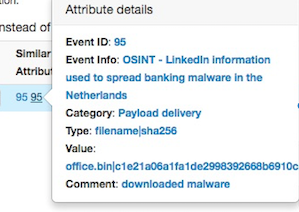
For example, you can see the ID of all related Events and view their information.
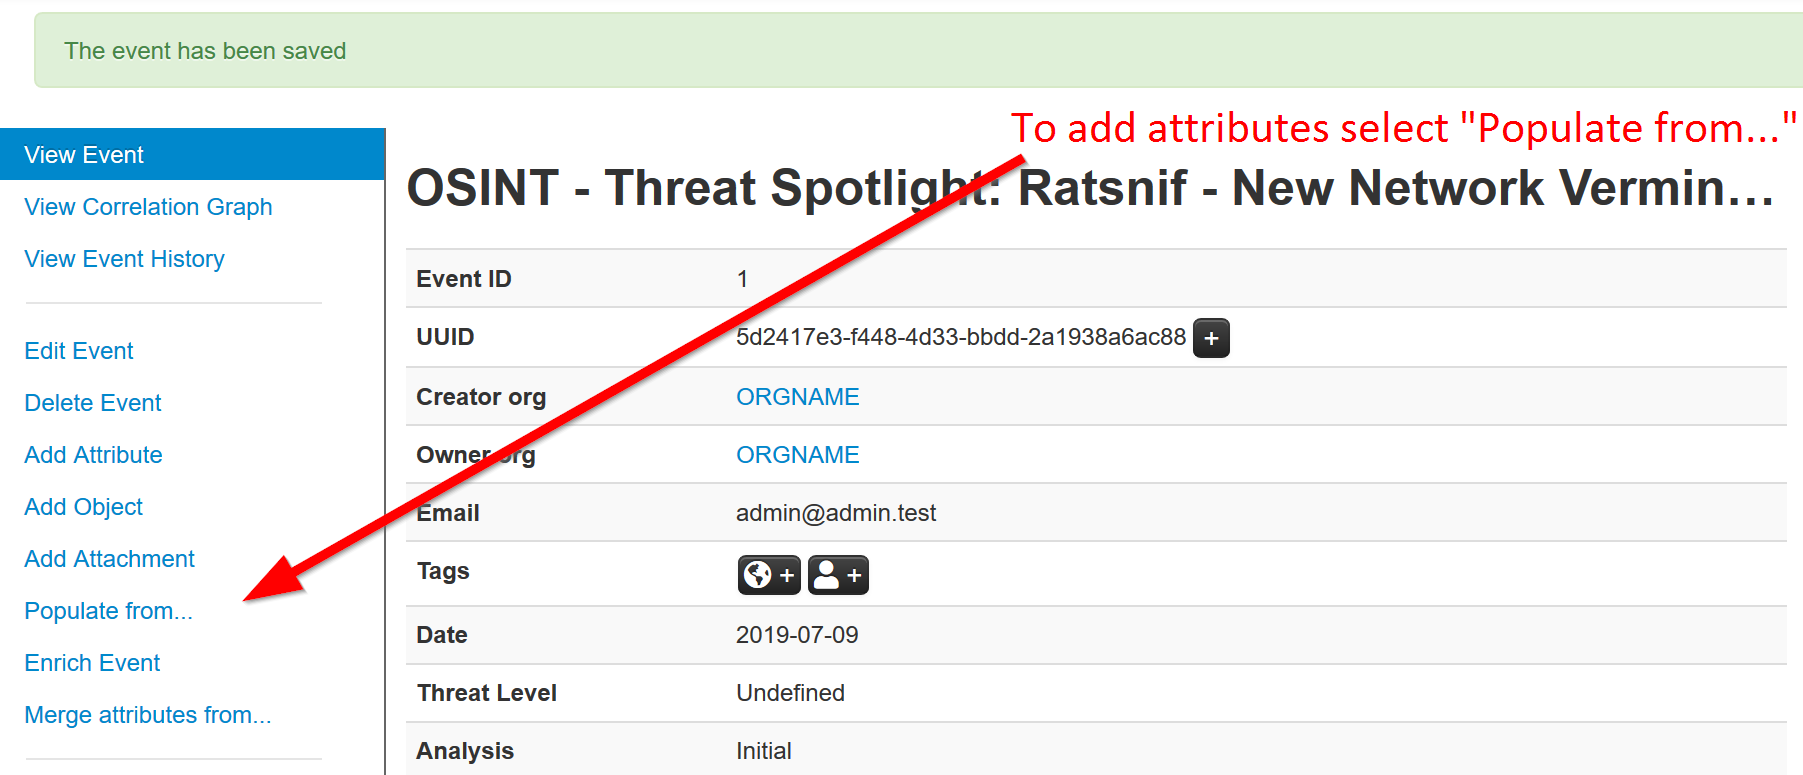
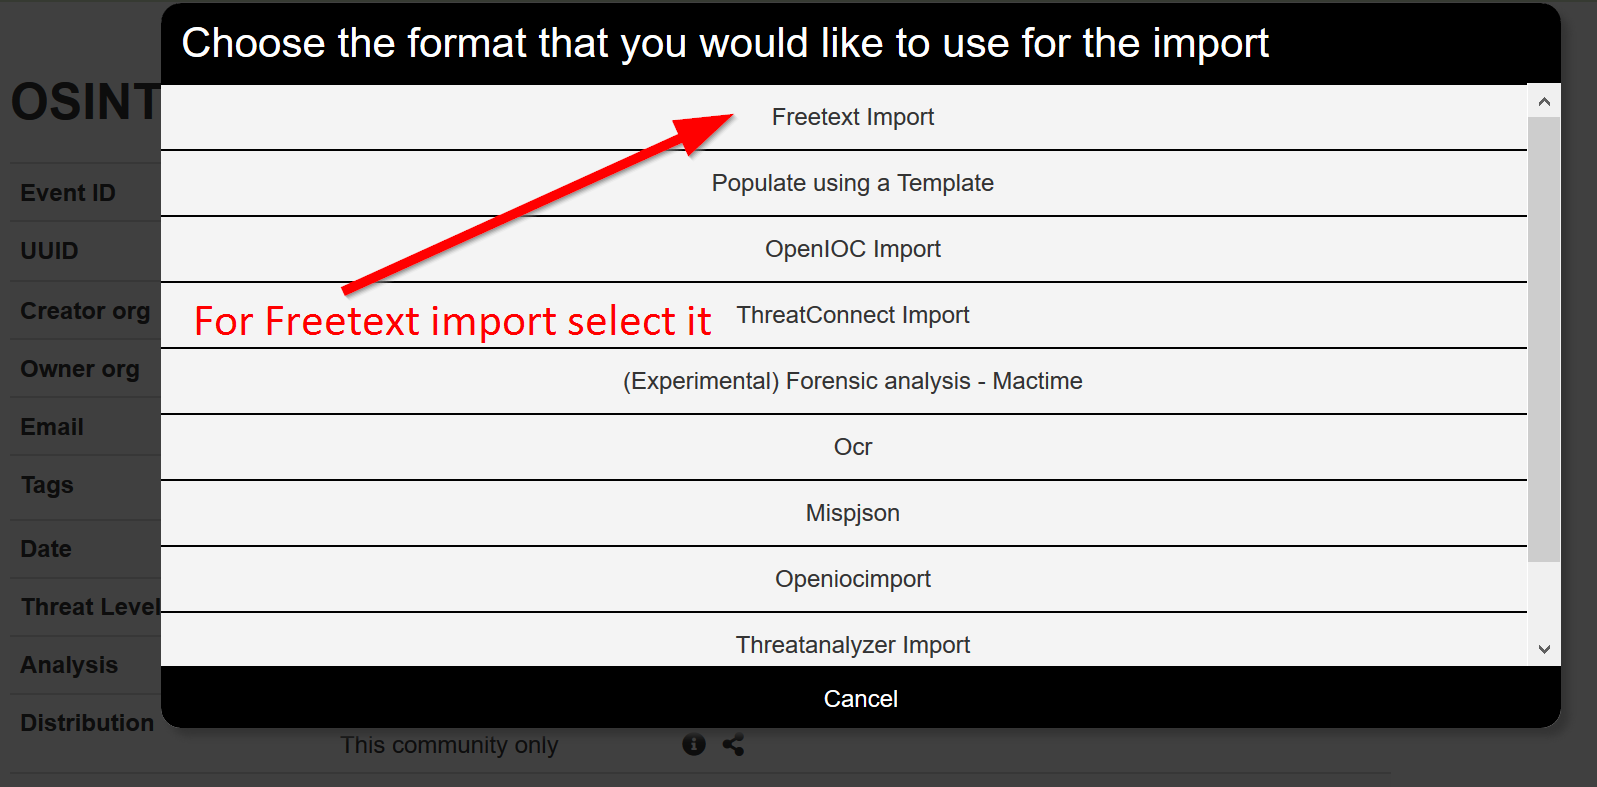
Alternative to import
An alternative route to reach the Freetext import tool is shown below.
Tags and Taglist
Using existing Data
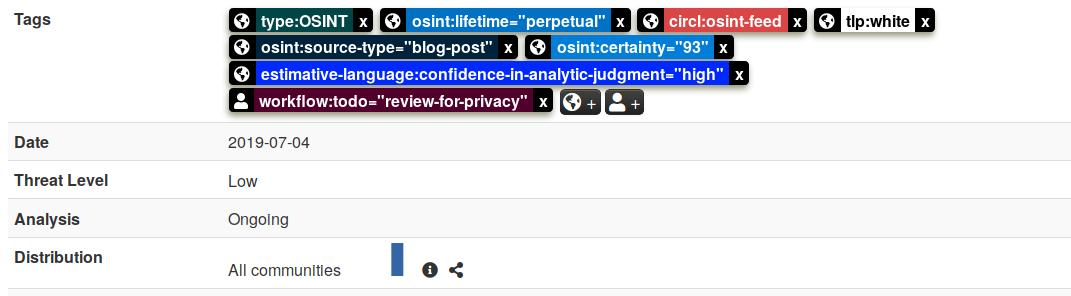
Another easy way to add information is to use Tags. You can see the result of adding existing Tags (circl:incident-classification=XSS ans circl:incident-classification=“information-leak).
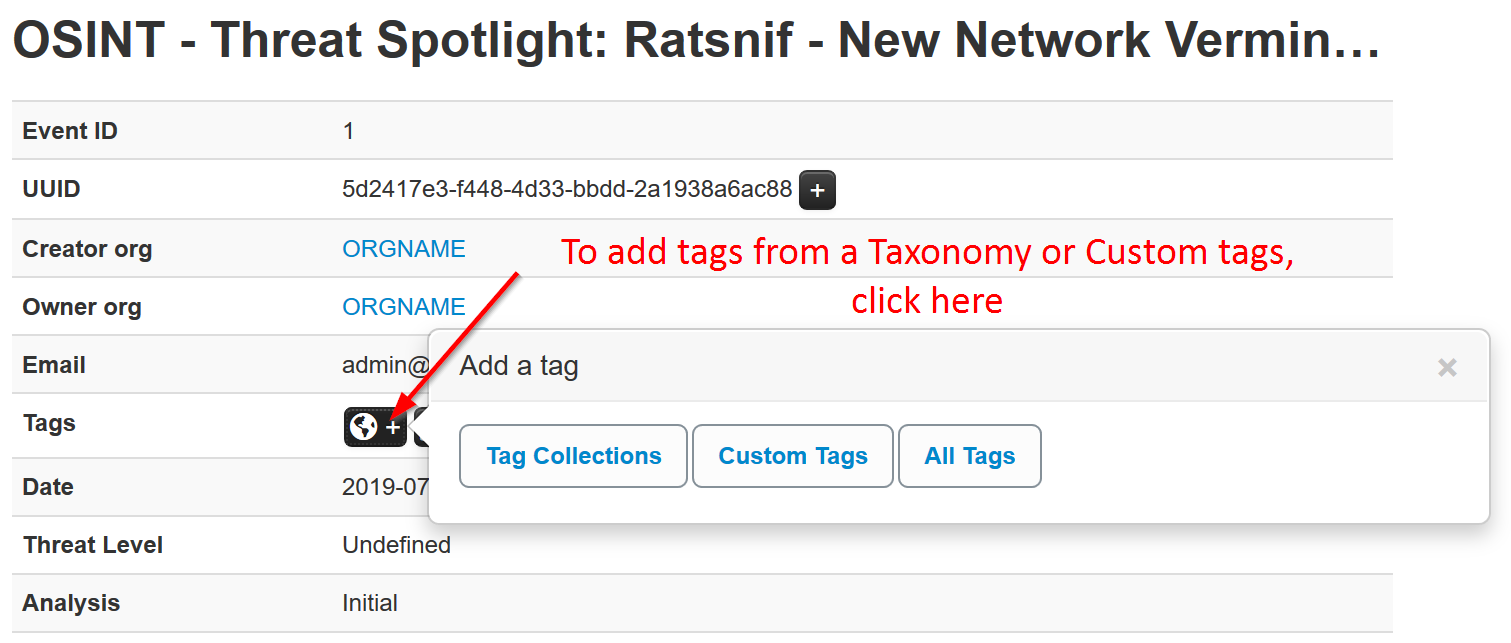
By clicking the button, you can add more tags from an existing Taglist.
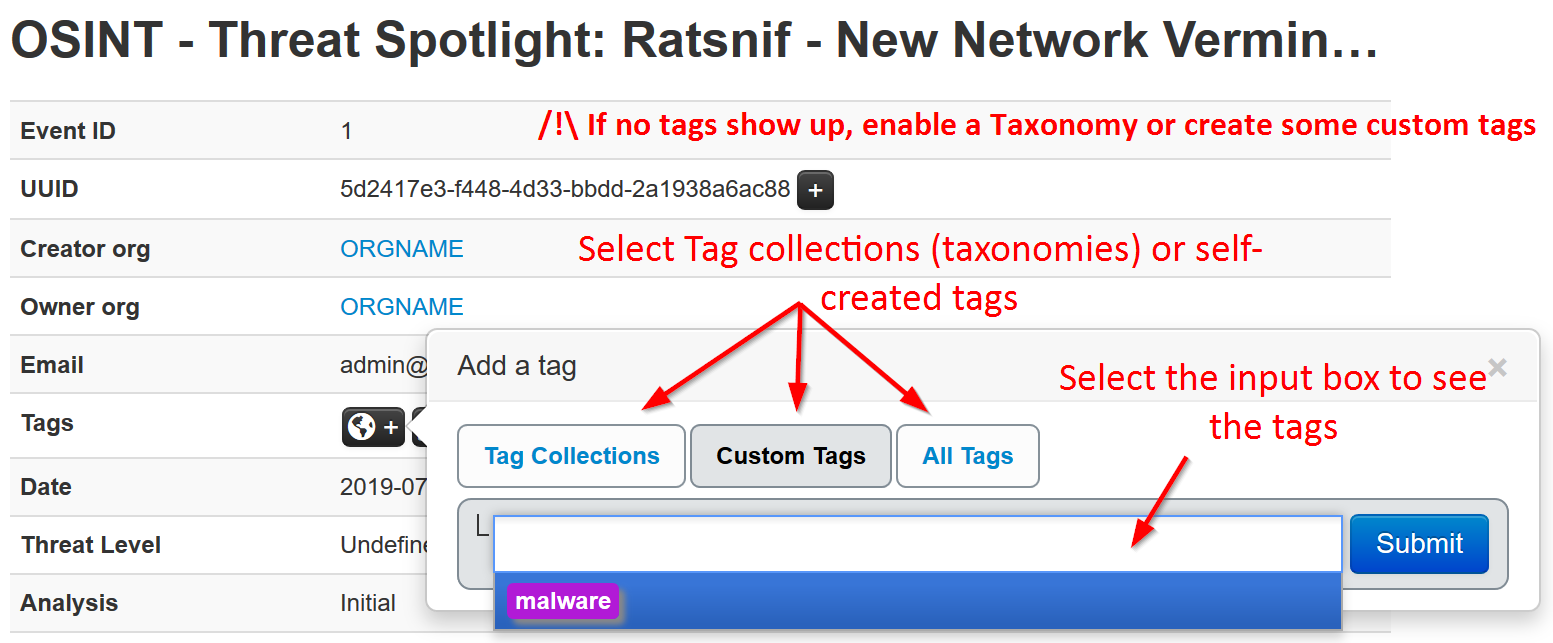
In particular the “Taxonomy Library: circl” Taglist is very complete.
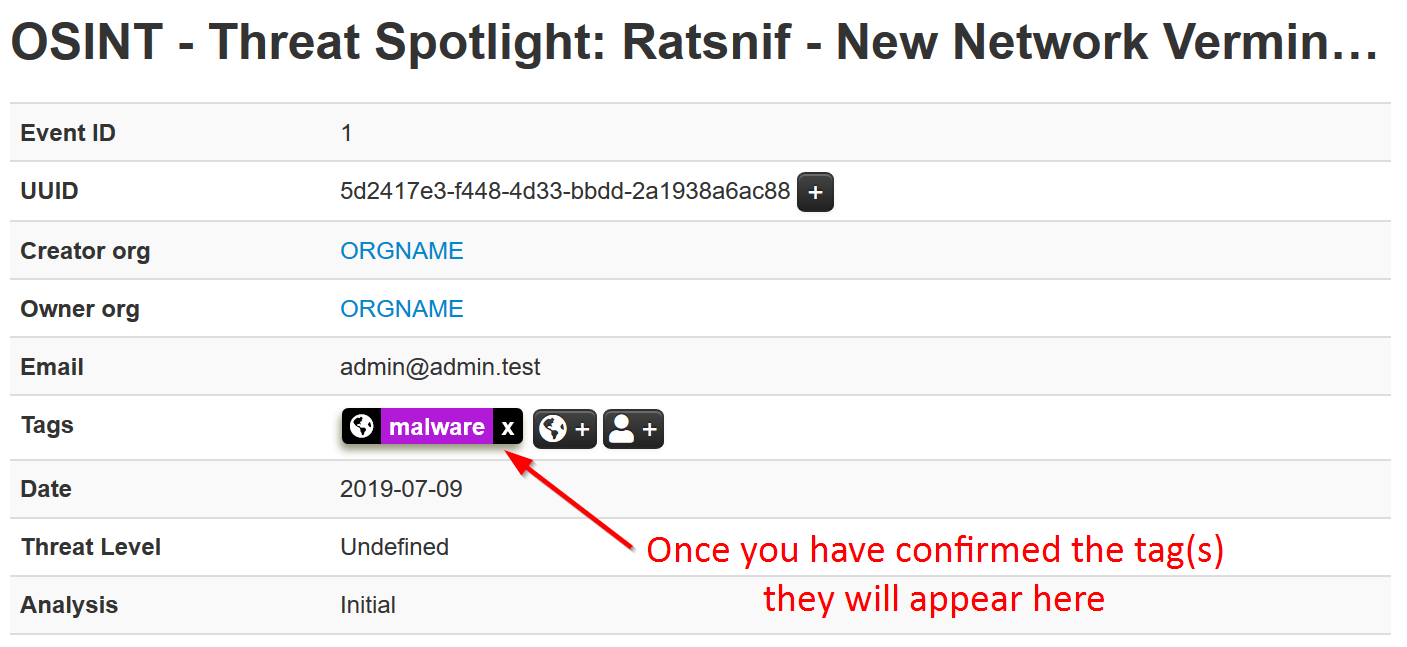
Once you added the tag(s) it will show in you main event window and in the list event view.
Local tags
Local tags can be added in a similar fashion.
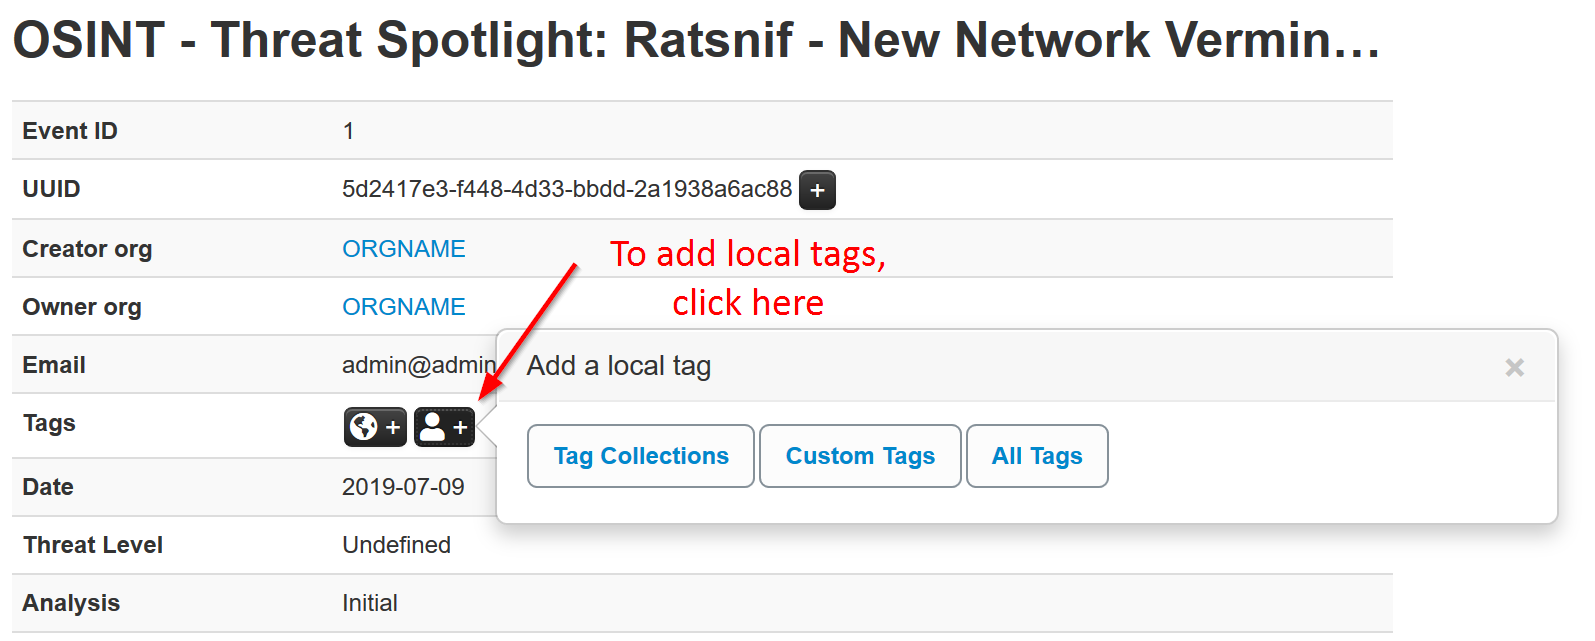
They will be identified by a corresponding icon.
No tags in list
In case you get the below. You need to either enable an existing Taxonomy or add some custom tags.
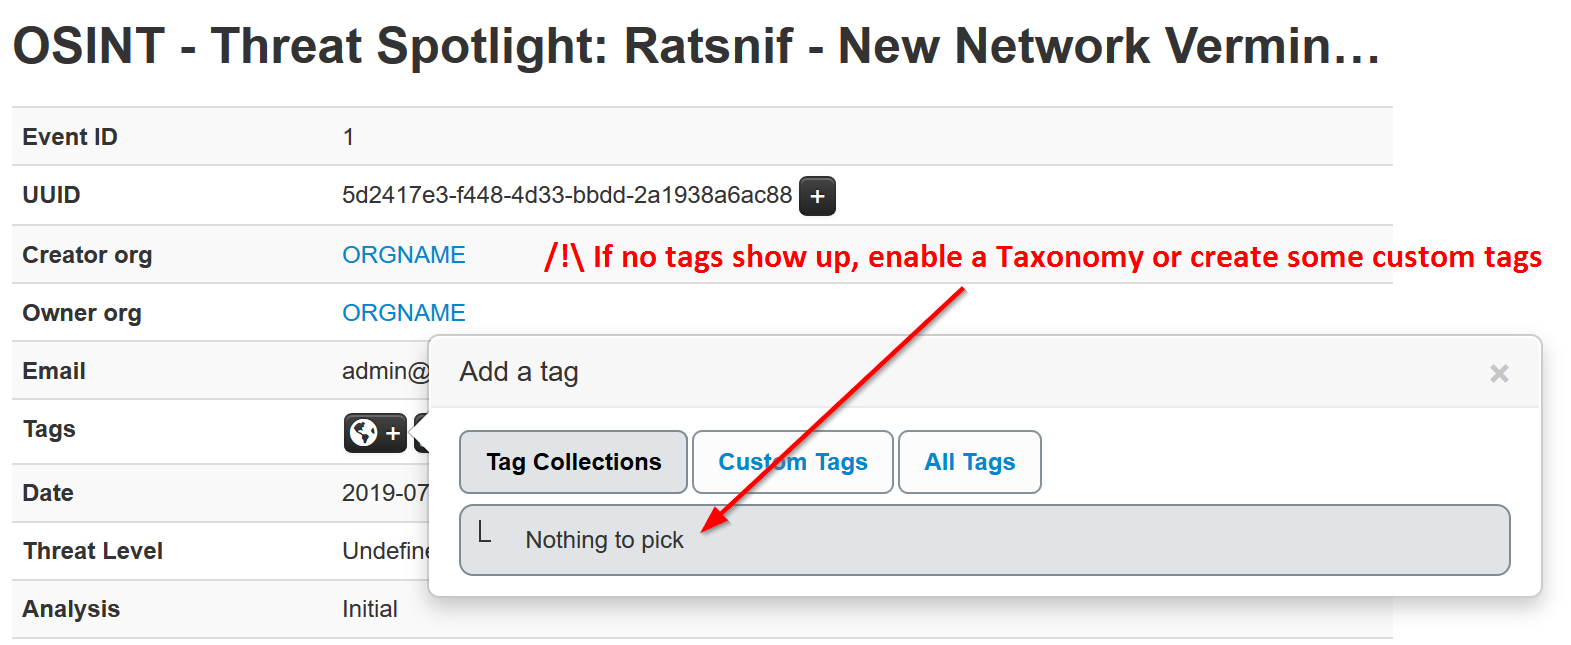
Make your own Taglist
If you want make your own Taglist, select Add Tag.
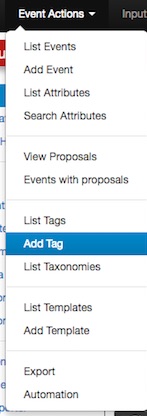
You will see the following window:
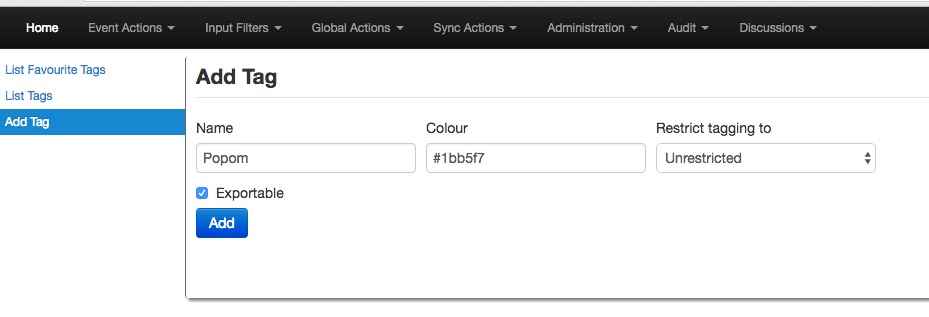
Then, when you add the new tag it will appear in the Custom Taglist.
Suggestions
The following attribute types should be added for each Event: - ip-src: source IP of attacker - email-src: email used to send malware - md5/sha1/sha256: checksum - Hostname: full host/dnsname of attacker - Domain: domain name used in malware
Browsing Events
To see your Event, select List Events from the menu Events Action. You can click any row and select a filter.
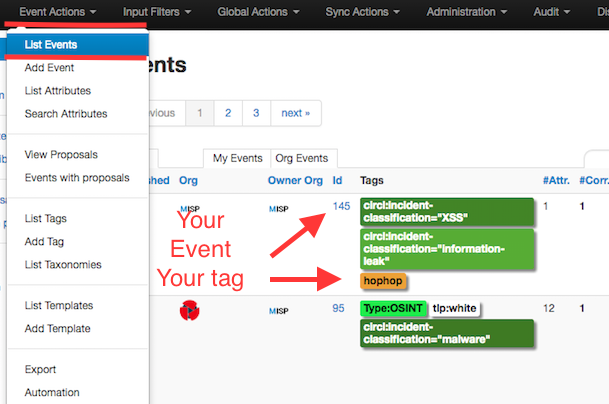
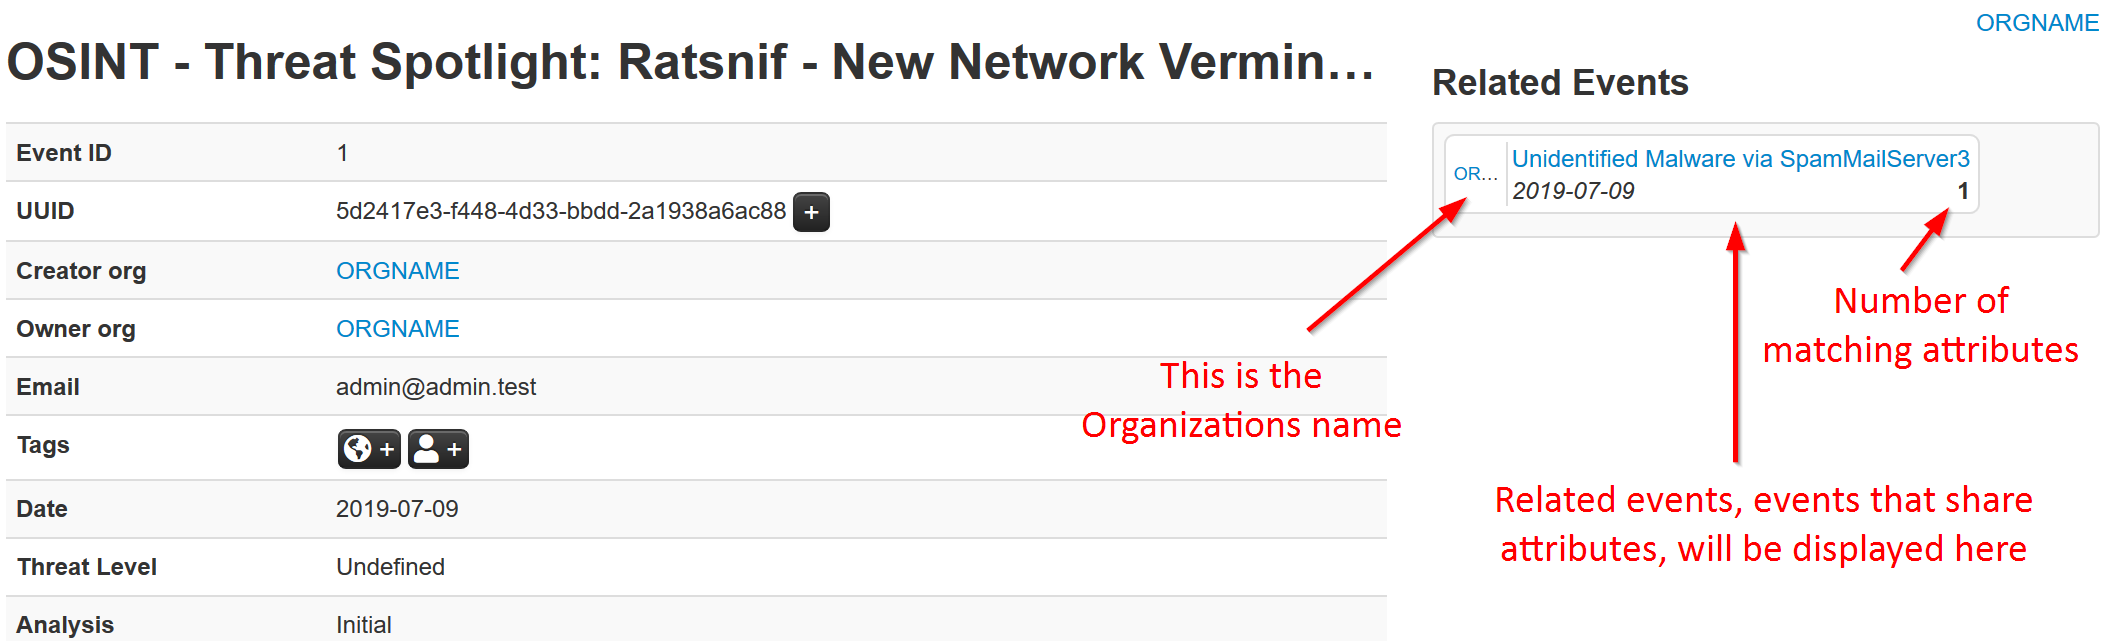
If you click on your Event’s number, you can see all the information related to your Event.
Export Events for Log Search
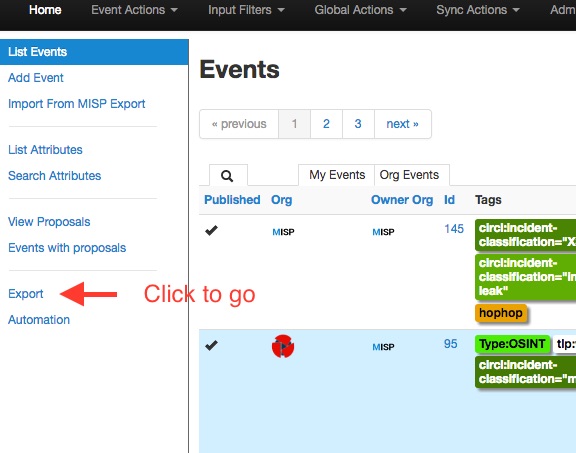
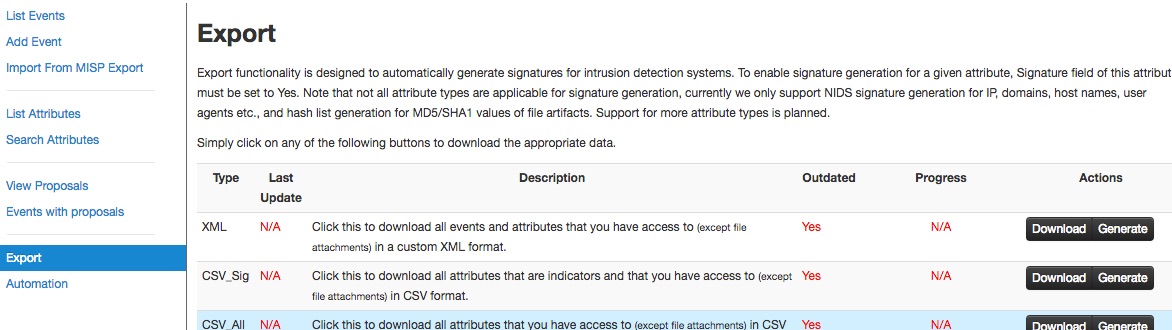
MISP can export your data in many formats for use in other tools — from plain MISP JSON/XML to detection rules (Suricata, Snort, Bro/Zeek), host and hash lists, CSV and STIX. Attributes flagged for Intrusion Detection System (the to_ids flag) are the ones included in the detection-rule exports; attributes without it are treated as context only. Use the export options to download the format you need — see the automation chapter for the full list of formats and the API.
Simply click on any of the following buttons to download the appropriate data for log correlation.
Enable a Taxonomy
Most taxonomies are disabled out of the box. To start tagging with one, go to Event Actions → List Taxonomies, find the taxonomy you want (for example tlp), and enable it — you can also enable all of its tags at once. Its tags then appear in the tag picker on events and attributes. See the Taxonomies chapter for more.
Enable and fetch a feed
MISP ships with a set of public OSINT feeds. To use one, go to Sync Actions → Feeds, enable a feed (the CIRCL OSINT feed is a good starting point), and then either cache it — for fast correlation against your data without importing — or fetch it to import its events into your instance. See the Managing feeds chapter for the details.